
The SONOFF NSPanel Pro is a cool gadget hardware-wise. On the software side, you are limited to the eWeLink app/ecosystem. As you know, the best way to create a smart home is to have everything connected together, so I will share with you the resources I used to run Home Assistant on the NSPanel Pro. After that, I will walk you through creating a simple but effective custom dashboard on Home Assistant for this panel, the same I showcase in my TikTok review.
Here you can buy the NSPanel Pro (if you haven’t already) → https://itead.cc/product/sonoff-nspanel-pro-smart-home-control-panel/ref/228/?campaign=LORIS
You can also get a special 20% OFF using the code LORIS20 (only in December 2023)
Enable ADB and install a launcher
ADB (Android Debug Bridge) is the tool that helps you connect to any Android device, NSPanel Pro included, from your computer.
If you don’t have ADB toolkit on your computer, here are some installation instructions: https://www.xda-developers.com/install-adb-windows-macos-linux/
Then, follow this guide, starting directly from the “V1.3.2 Changes” → https://blakadder.com/nspanel-pro-sideload/
After you enabled ADB on your panel, jump to the section “Using ADB” and follow the instructions until the end.
Update the WebView component
The NSPanel Pro software embeds an outdated web engine (or WebView). Updating it will allow you to run and display web-based apps like Home Assistant.
Follow this guide starting directly from the “Install a Launcher” section → https://blakadder.com/nspanel-pro-sideload/
Install Home Assistant companion
Finally, the NSPanel Pro is ready to run Home Assistant.
Go on the official Home Assistant android GitHub → https://github.com/home-assistant/android/
Click on the latest release and download the app-minimal-release.apk
With ADB, run the following command to install Home Assistant companion:
adb install "/path/to/the/*app-minimal-release.apk"
And that’s it! You can now run Home Assistant from the NSPanel Pro.
Creating a custom dashboard
The NSPanel Pro having a very small screen, it’s the perfect occasion to redesign your existing dashboard. And the best thing is that you can do it very easily on the basic Lovelace dashboard system, without even writing complex YAML code.
First things first, I suggest that you create a dedicated Home Assistant account for your NSPanel Pro. Not only this will add a security layer, but this will allow you to make your dashboard more accessible for the panel.
On Home Assistant, go to Settings > People > Add person. Make sure the “can only log in from the local network” is ON and the “administrator” toggle is OFF. Now you can log in directly from the dedicated panel account on the NSPanel Pro.
To design a dashboard for the NSPanel Pro, a neat thing to do is simply to resize your browser window to mimic the size of the NSPanel Pro.
When you add a view make sure its visible to your new NSPanel Pro user. Additionally, you can hide all the other “desktop” views for this specific user.
I chose to create a dedicated view for each category of appliances in my apartment, therefore:
- Shades and curtains
- Lights
- Music/multimedia
- Heating, ventilation, air conditioning
- EXTRA: NAS management
Let’s go over each view.
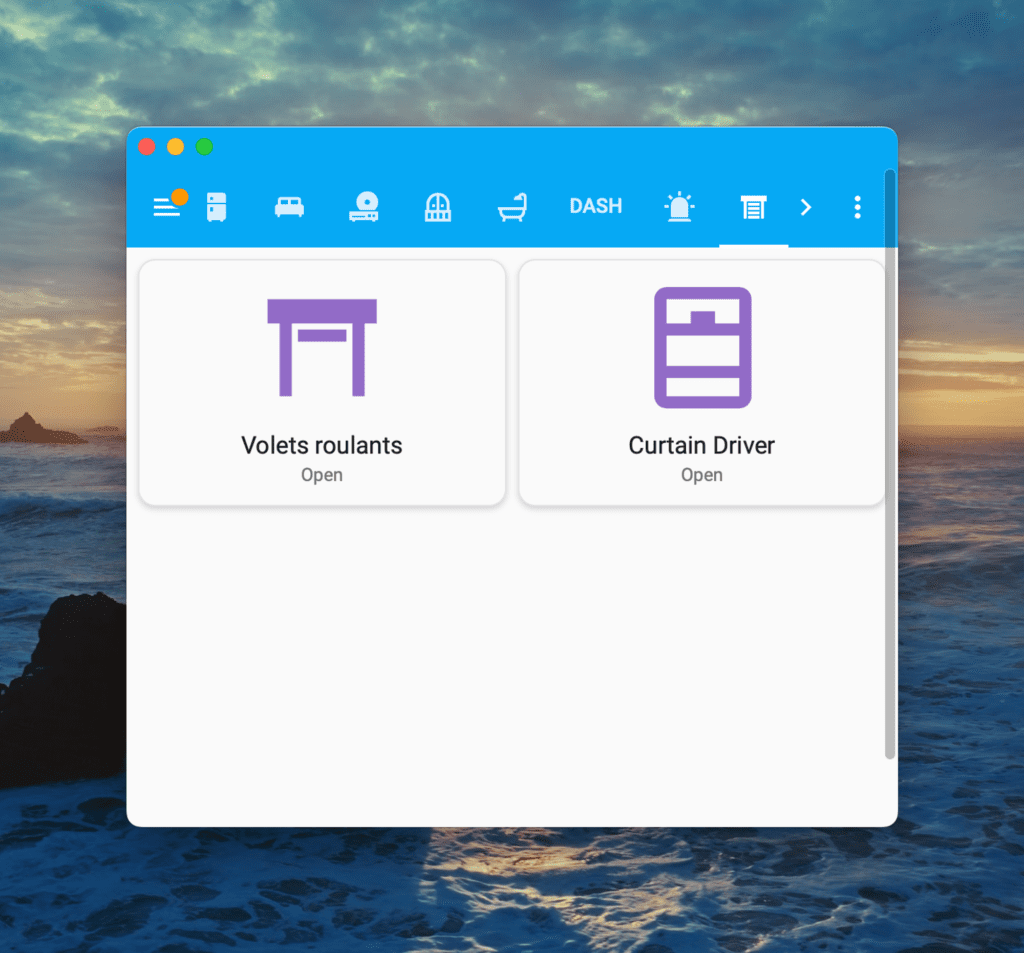
Shades and curtains
In order to manage the restricted space in the view, one of the best native component you can use is the horizontal stack card. The horizontal stack card will resize the items living in it, in order to fit within the available width of the NSPanel Pro.
The shades and curtains view is the simplest implementation of this tactic.
Just add an horizontal stack and put at least two subcards. I use two “Button” cards as they are big enough to make the NSPanel Pro UI useable. Don’t hesitate to use any custom card you want if it’s convenient for you.
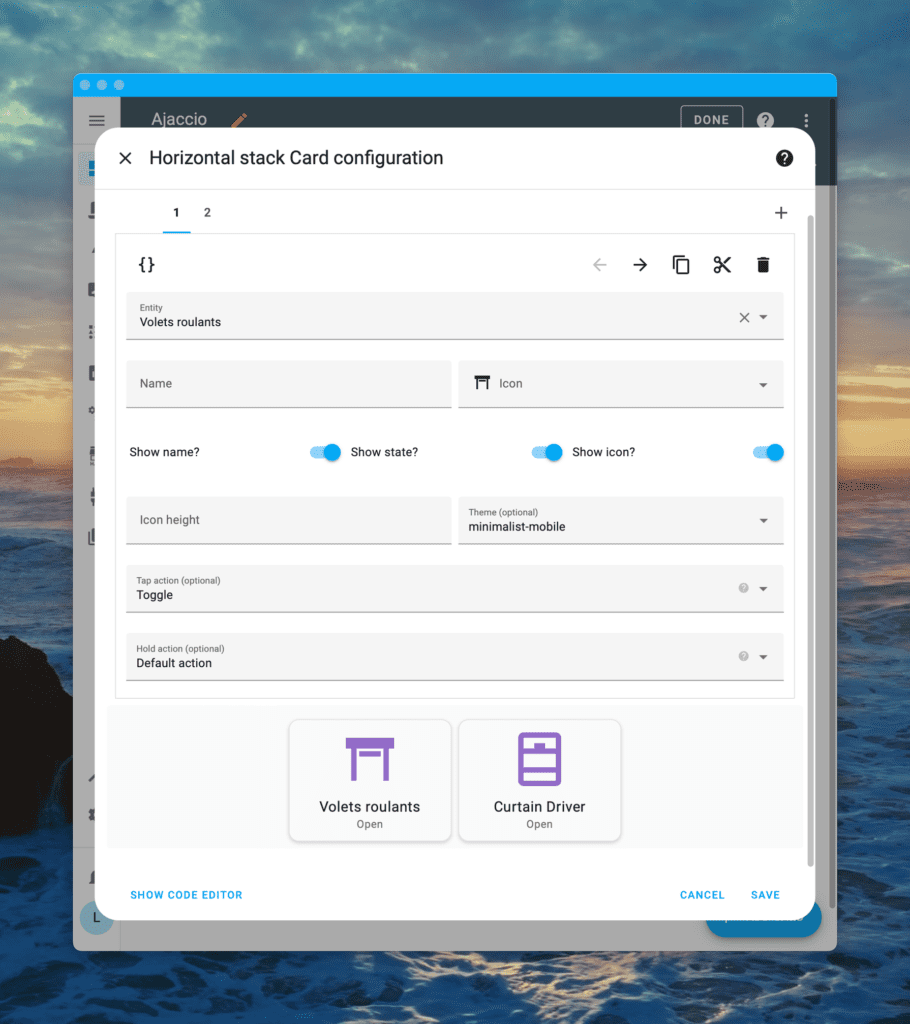
The customisation is trivial. I chose to display the name, state and icon of my appliances in order to make it easy to know what I’m looking at, by just glancing at the panel. You can also specify the icon height which might be useful to tweak with, if you’re trying to fit multiple cards vertically.
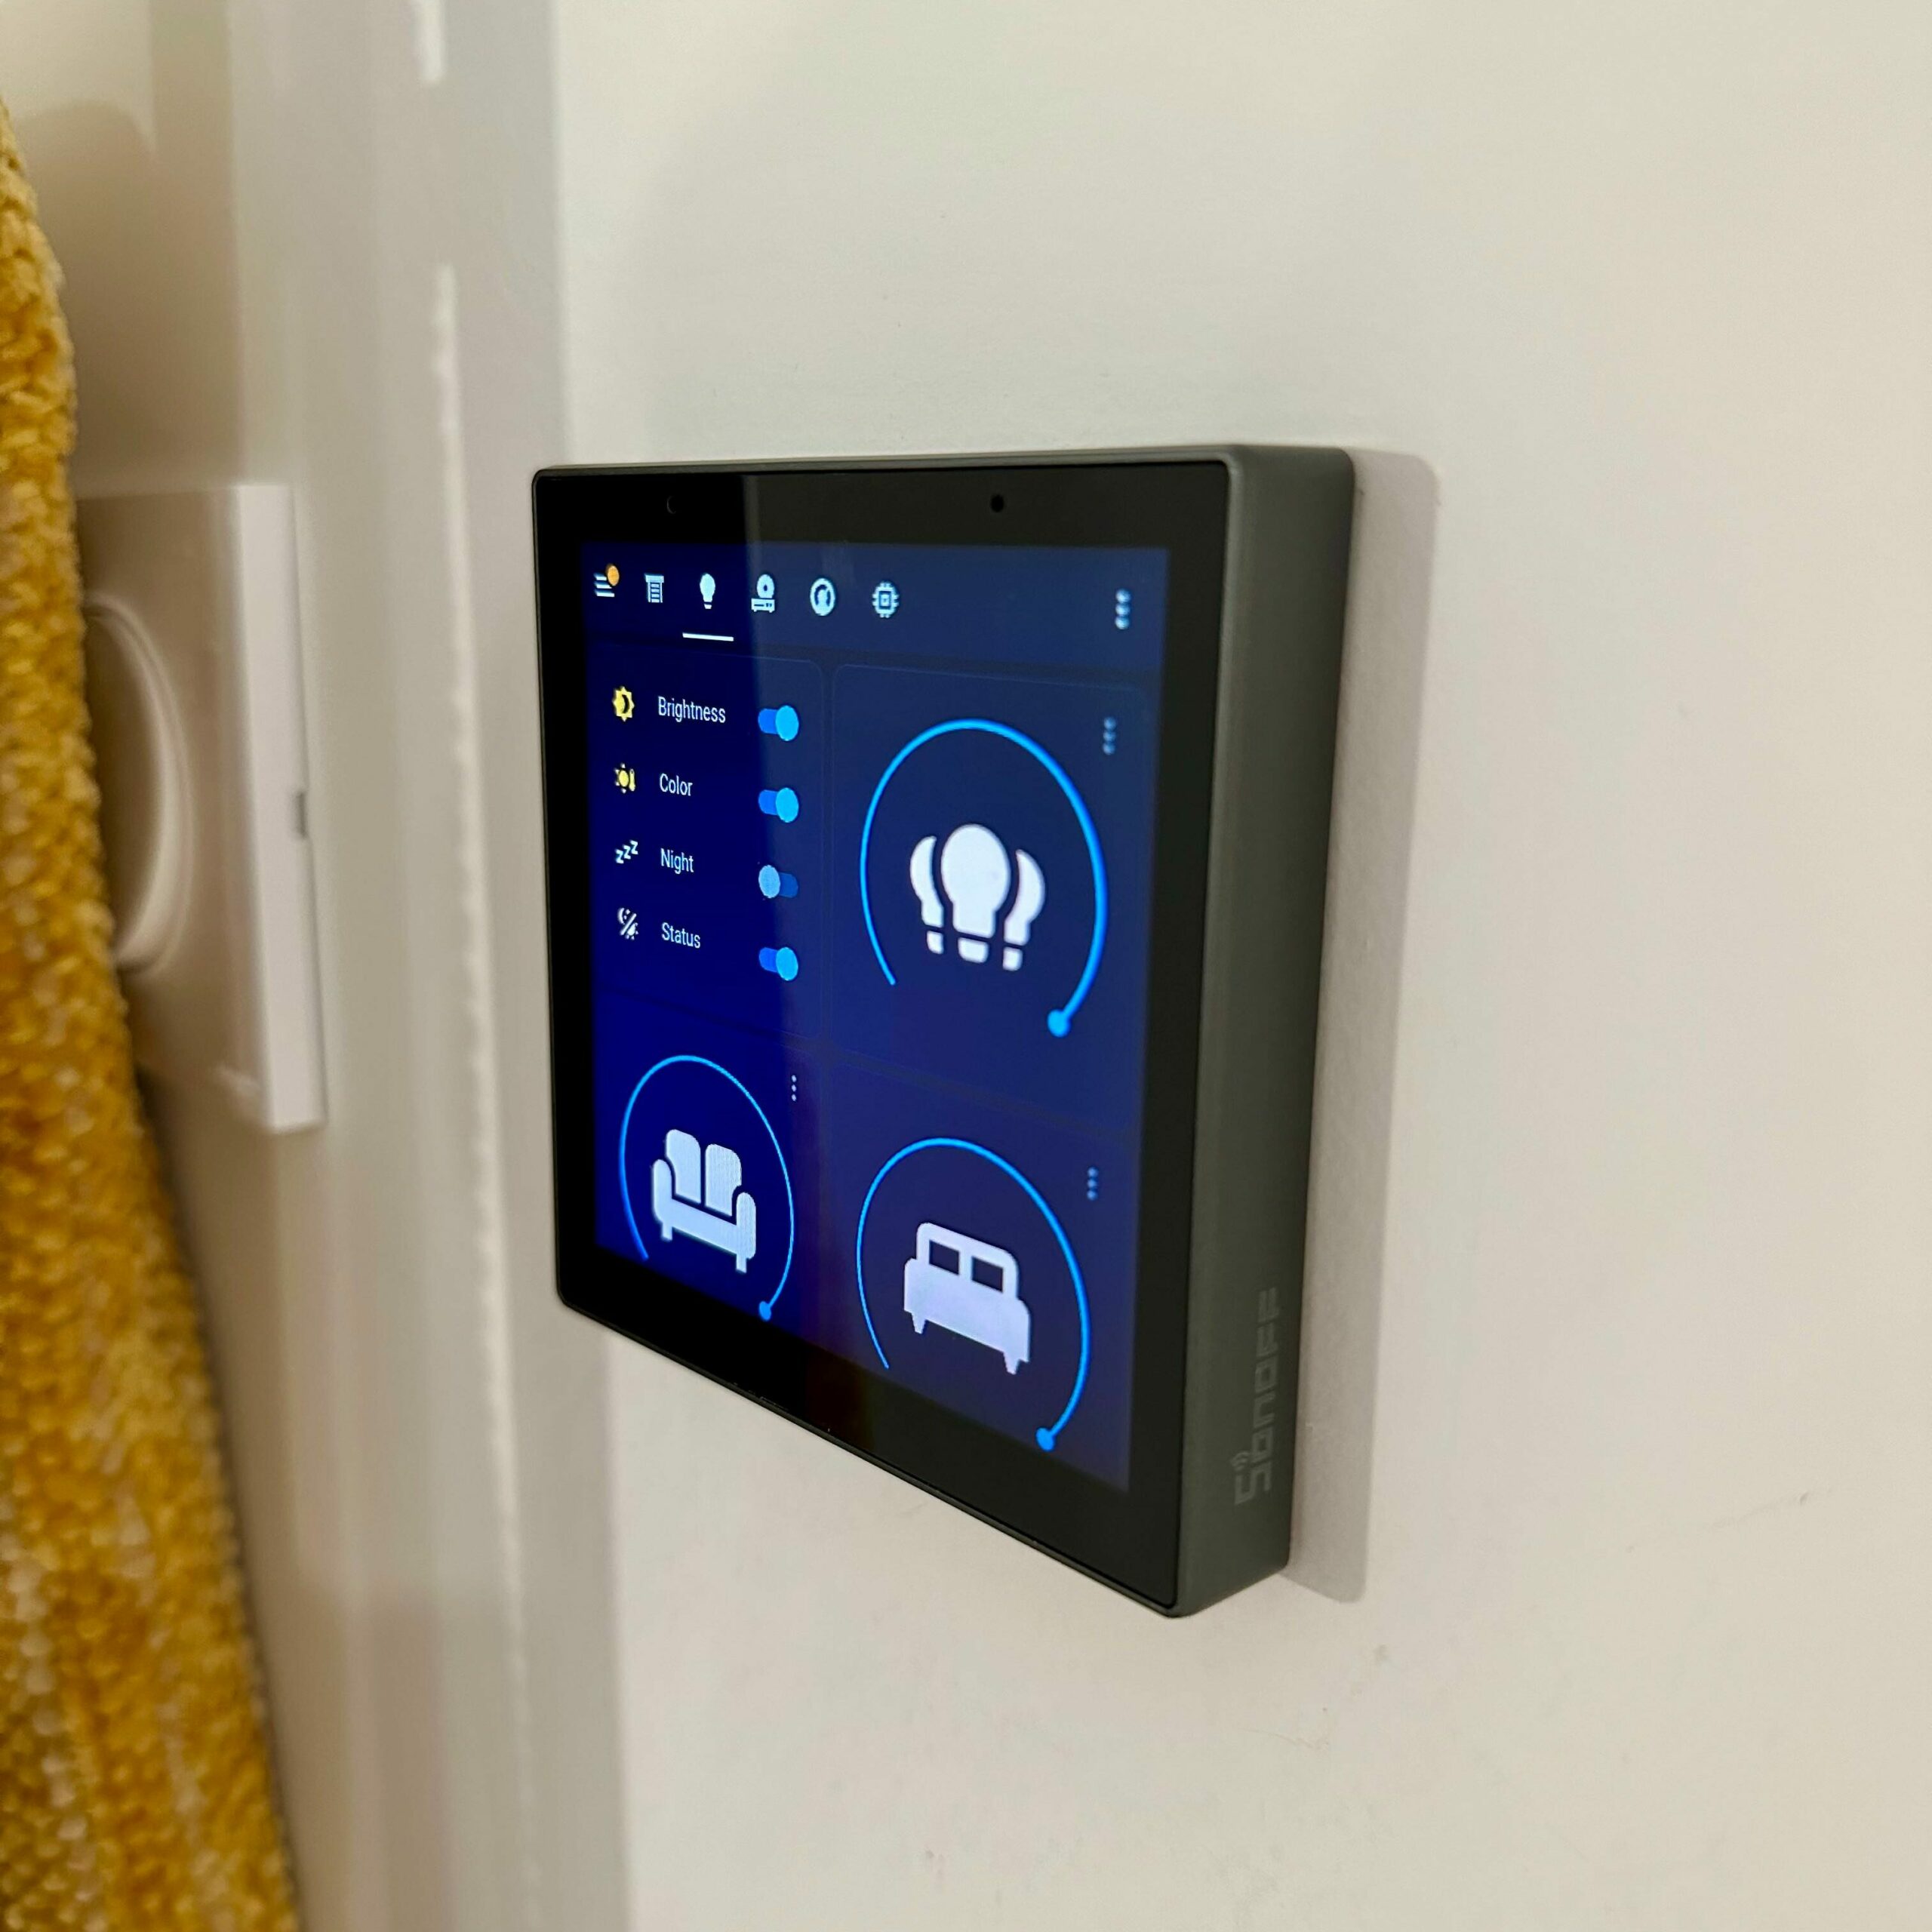
Lights
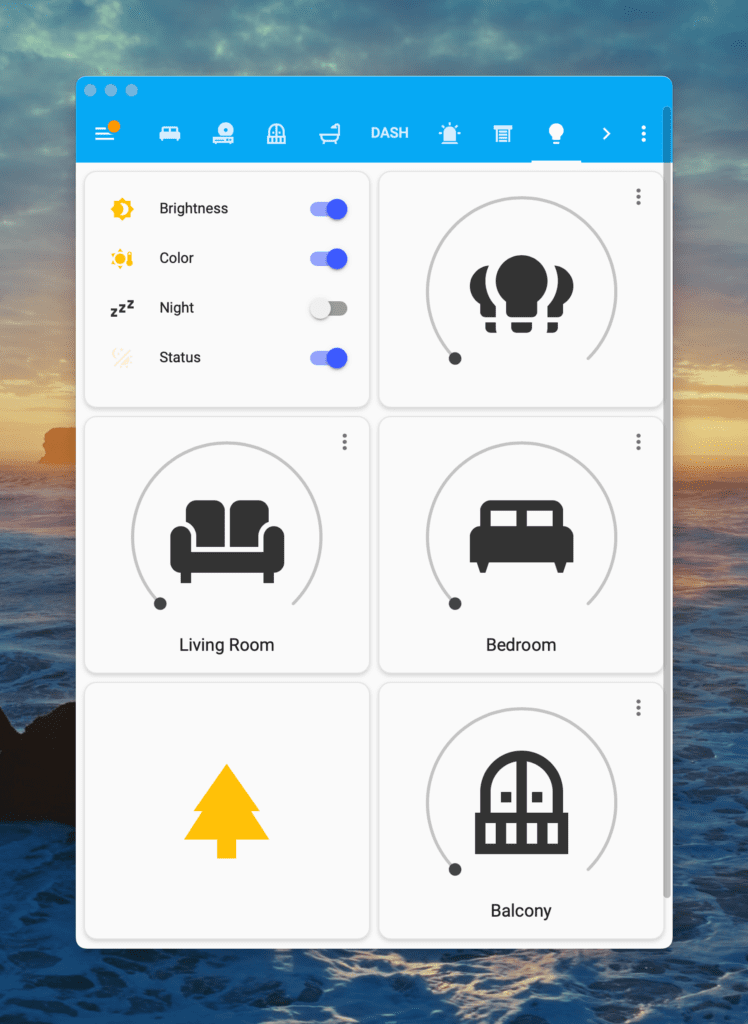
The lights’ view is composed of 3 horizontal stacks. The first two are directly visible and the last one will require me to scroll the screen to access it. Therefore, the first two stacks must contain the most important entities.
For the first horizontal stack I used an “entities” card to display the adaptive lighting controls. FYI, adaptive lighting modify my lights’ brightness and color temperature throughout the day depending on the sun’s position. I also used a “Light” card allowing me to control ALL the lights in the appartement by eitheir taping on the card to turn them ON/OFF, or by using the slider to control the brightness.
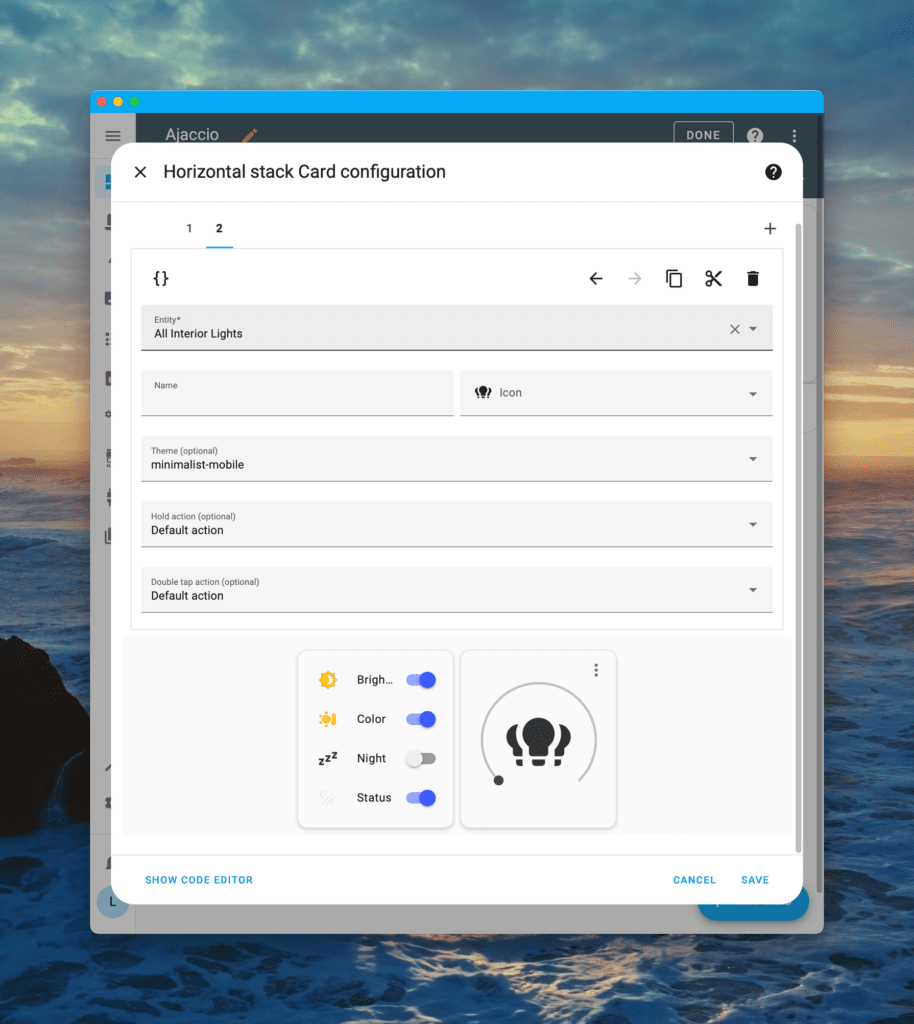
You can also modify the “hold” and “double tap” action to display a custom menu to control other aspects of your lights. For example, the color of your lights:
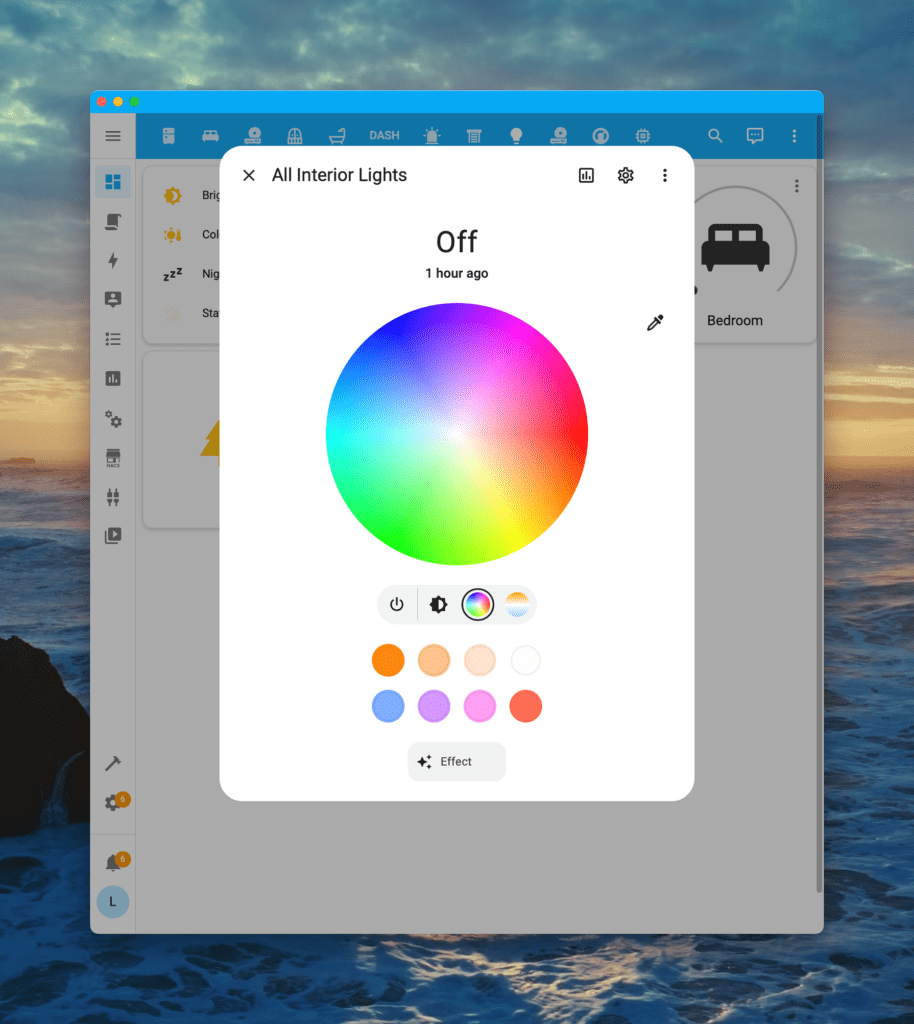
The second horizontal stack is composed of two “light” cards controlling the living room and bedroom groups of lights.
The third and final horizontal stack is composed of a “button” and a “light” card. The button card lets me toggle a boolean that triggers the Christmas scene and playlist throughout the apartment 🎄. Finally, the light card lets me control the balcony lights, which I rarely use, that’s why it’s the last entity on-screen.
Music/multimedia
I have a few SONOS speakers in my appartement. As they have a very “open” software, they come with an official Home Assistant integration, they are simply lovely to work with.
My view consists of the implementation of one custom card, the custom-sonos-card. A fantastic lovelace card developped by Johan Frick → https://github.com/johanfrick/custom-sonos-card
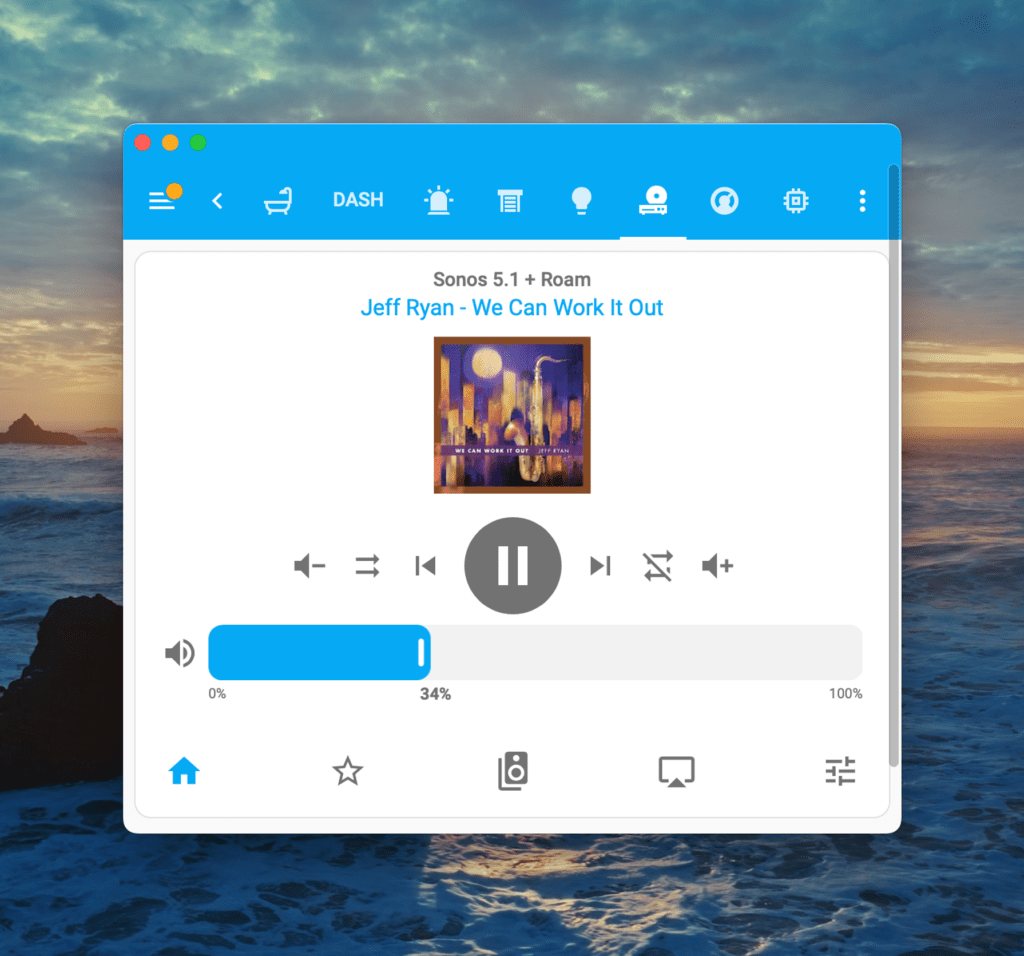
This view is very versatile and easy to work with. It allows control over one or multiple speakers, with basic controls like the volume, select various sources (SONOS playlists, Spotify etc.) and most importantly (at least for me): grouping your speakers for multi-room audio. You can even individually control the volume and properties of each speaker.
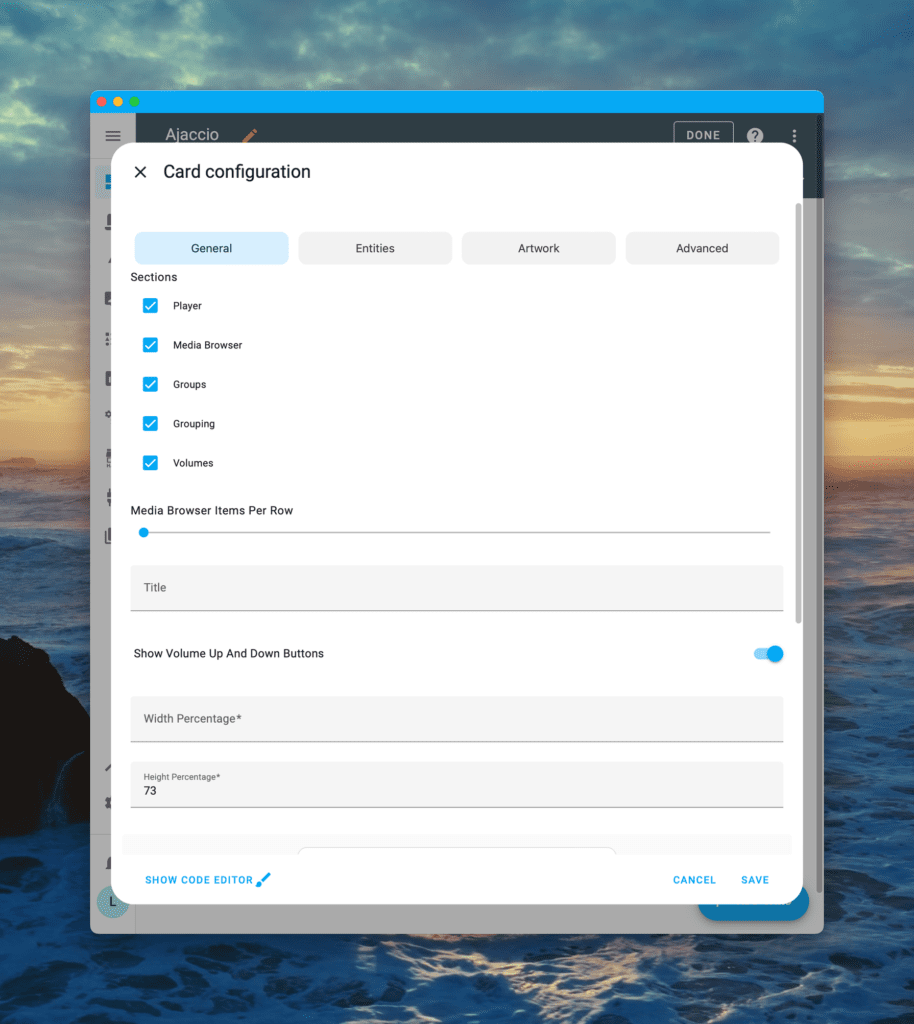
The height is also customizable, thankfully. I set 73 as height percentage as it fits the NSPanel Pro screen height perfectly.
If you want to replicate my setup, here is my configuration you can copy paste (and adapt of course):
type: custom:sonos-card
sections:
  - volumes
  - grouping
  - player
  - media browser
  - groups
showVolumeUpAndDownButtons: true
heightPercentage: 73
predefinedGroups:
  - name: Sonos 5.1 + Roam
    entities:
      - player: media_player.sonos
      - player: media_player.roam
  - name: Everywhere
    media: ''
    entities:
      - player: media_player.sonos
      - player: media_player.symfonisk_2
      - player: media_player.roam
topFavorites:
  - ''
dynamicVolumeSlider: true
mediaBrowserShowTitleForThumbnailIcons: false
mediaBrowserItemsPerRow: 1
card_mod:
  style: |
    ha-card {

      --accent-color: #06A9F4;

    }
Heating, ventilation and air conditioning
Also known as HVAC, it’s a key part of any smart home in order to optimize energy spendings while maintaining thermal comfort.
UI Wise, the stock “Thermostat” card is just too big to fit the panel’s screen size. But fear not, Home Assistant fantastic community always has a convenient alternative. In this case, simple-thermostat is probably the most suitable solution → https://github.com/nervetattoo/simple-thermostat
This custom card is a minimalist take on the original thermostat card. Keeping the basic features while being fairly customisable.
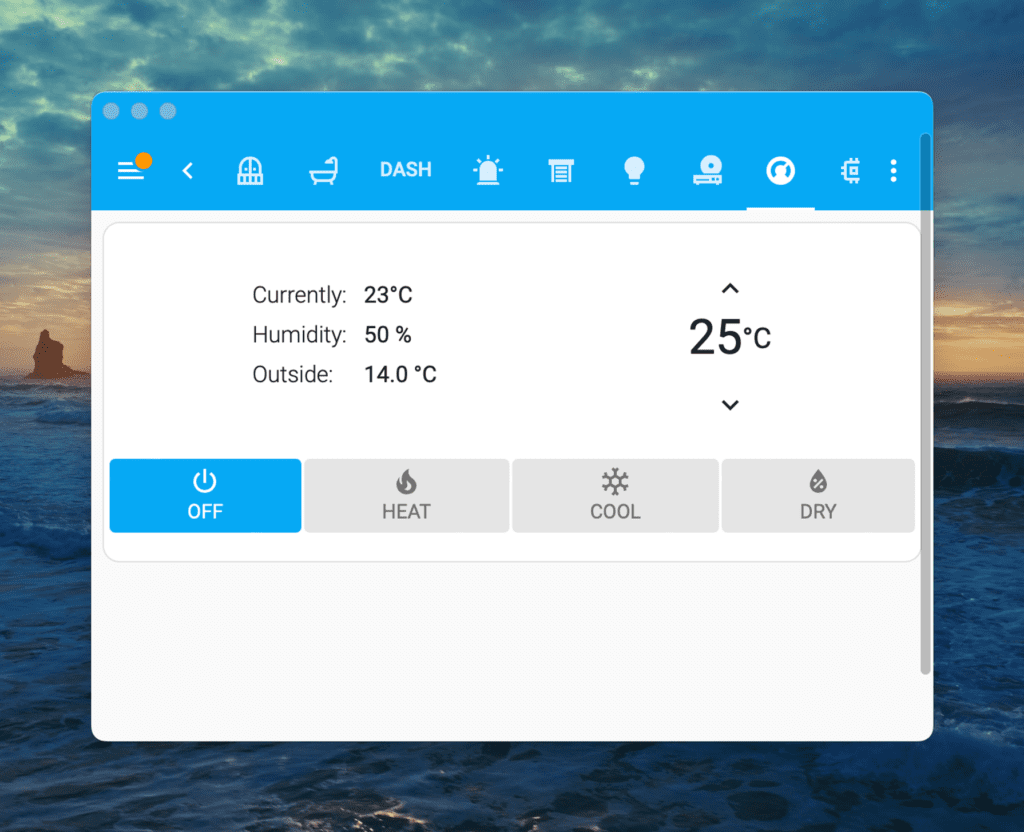
On the right side you can set one or more thermostat controls (radiator, a/c or any generic entity). On the left side you can set various variables. In my case I did set my purifier’s temperature and humidity sensors as it’s in the middle of the room and probably more accurate than the embedded sensors on my a/c and radiator. I also set the outside temperature sensor here, as it’s a convenient variable to check.
On the bottom I kept the most useful action modes of my A/C.
The power of this integration is really its versatility and minimalist design. You can also customize the font size, which is perfect to tweak with a small screen like the NSPanel Pro!
Here is my configuration you can copy paste (and adapt of course):
type: custom:simple-thermostat
entity: climate.daikinap83672
header: false
step_size: 1
sensors:
  - entity: sensor.pure_cool_link_humidity
    name: Humidity
  - entity: sensor.daikinap83672_outside_temperature
    name: Outside
decimals: 0
hide:
  state: true
layout:
  mode:
    icons: true
    headings: false
control:
  hvac:
    'off':
      name: 'OFF'
    heat:
      name: HEAT
    cool:
      name: COOL
    heat_cool: false
    dry:
      name: DRY
    fan_only: false
style: |
  ha-card {

    --st-mode-active-background: #06A9F4;
  }
EXTRA: NAS management
If you have a NAS (and you should), having easy access to its health and basic controls through an always-on panel in the house is a real benefit.
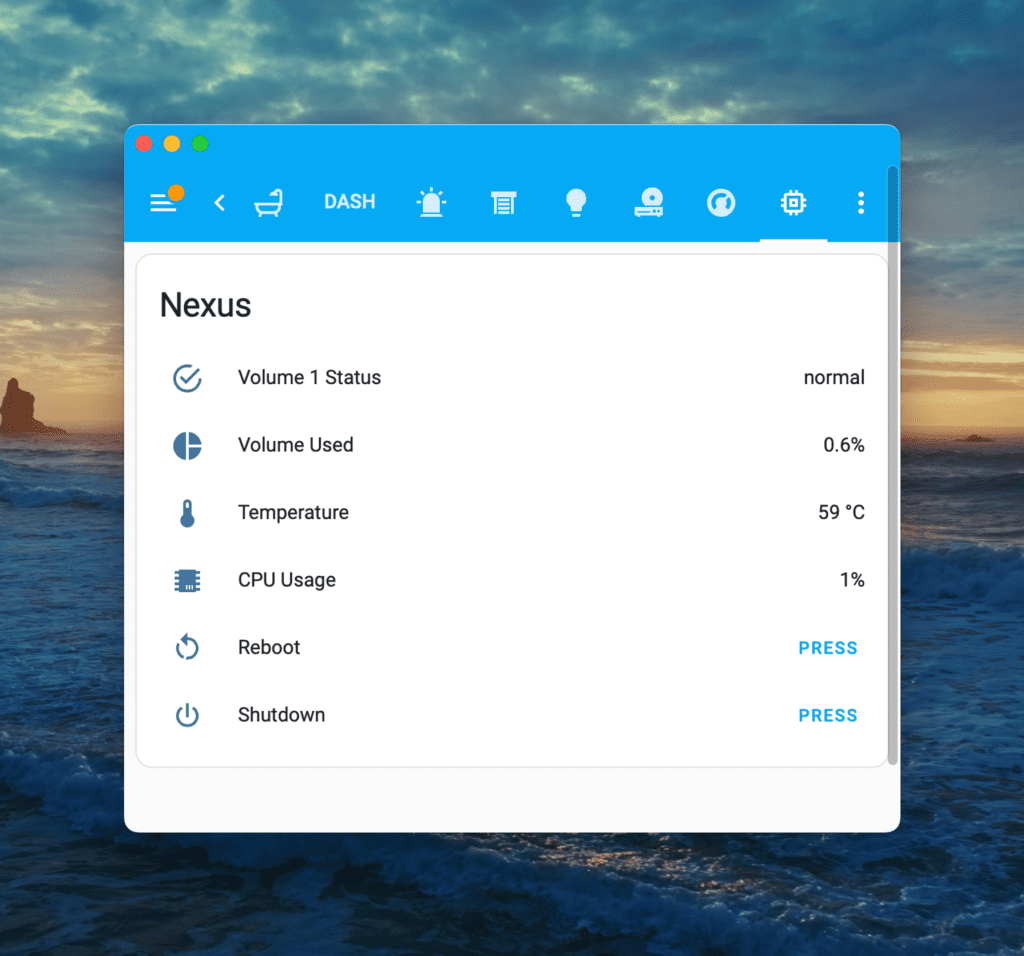
This one is really easy to setup. It’s just an “entities” card with the most useful variables and actions (at least according me):
- The general health status of your disk pool
- The % of storage used globally
- The CPU temperature
- The CPU load (or usage)
- A reboot action button
- A shutdown action button
I found myself using the shutdown button quite a lot these days, as I was turning off the electricity in the house to safely work with wires. By shutting down my NAS gracefully using this button, I save myself from logging in and manually shutting it down for obvious electricity safety measures.
This view is really nothing fancy but so useful when you need it.
What’s next?
As we’ve enabled ADB and updated the NSPanel Pro webview, we literally can load any APK or webview to make this panel even more convenient and smarter.
However, as we are now “on our own” regarding the power usage of this panel, the screen will either stay on forever, or it will turn off automatically after a few seconds. Neither are good, I’ll show you two ways to make the NSPanel Pro smarter by turning it on when you want, a.k.a, the real icing on the cake.
Method 1: Device’s proximity sensor
Two great things about our setup:
- NSPanel Pro has a proximity sensor
- Home Assistant companion let us access the sensors of any device it is connected to
Combining those two things, we can create our own automation, that will make the panel turn on only when someone is detected in front of it.
In order to do this, go to the integrations screen on Home Assistant. Under the Mobile App integration, you will have your NSPanel Pro. You will notice that there are at least 50 sensors that you have access to, but most of them are disabled.
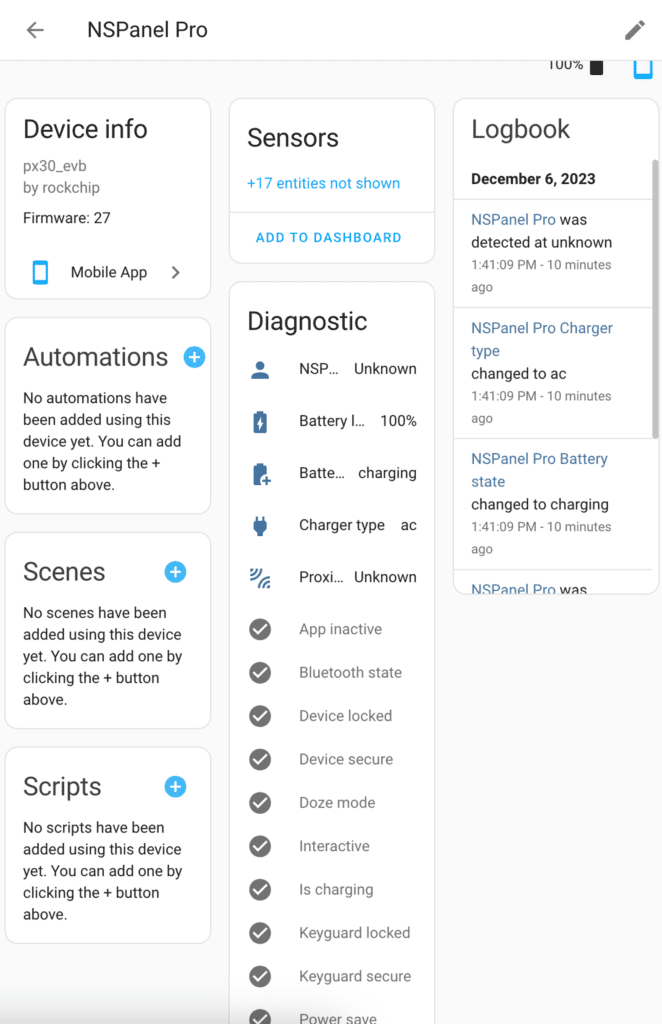
Scroll down until you see the proximity sensor, click on it, then tap the settings button (the cog wheel ⚙️) and click on “ENABLE”.
Now we will be able to use this sensor to create an automation.
Method 2: Using ADB’s integration
Home Assistant has a native integration that allows you to control your android devices like we did in the first part of this tutorial.
In the integrations screen, add an integration and look for “Android Debug Bridge”
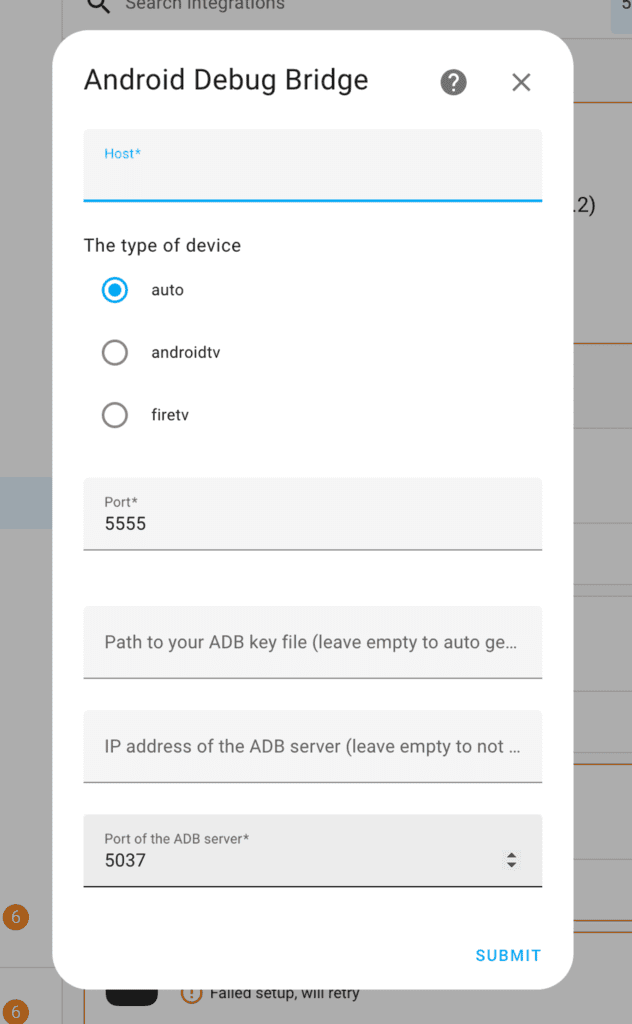
On the “Host” field, type the NSPanel Pro’s IP address.
By the way, now is a good time to set a static IP address to your panel. You can do this with your router. This will prevent Home Assistant from losing the connection when your DHCP server renews the IP of the panel.
Leave the other fields untouched, simply tap on submit and you’re good to go.
When you access your device through the ADB integration, you can see it is displayed as a media_player entity type.
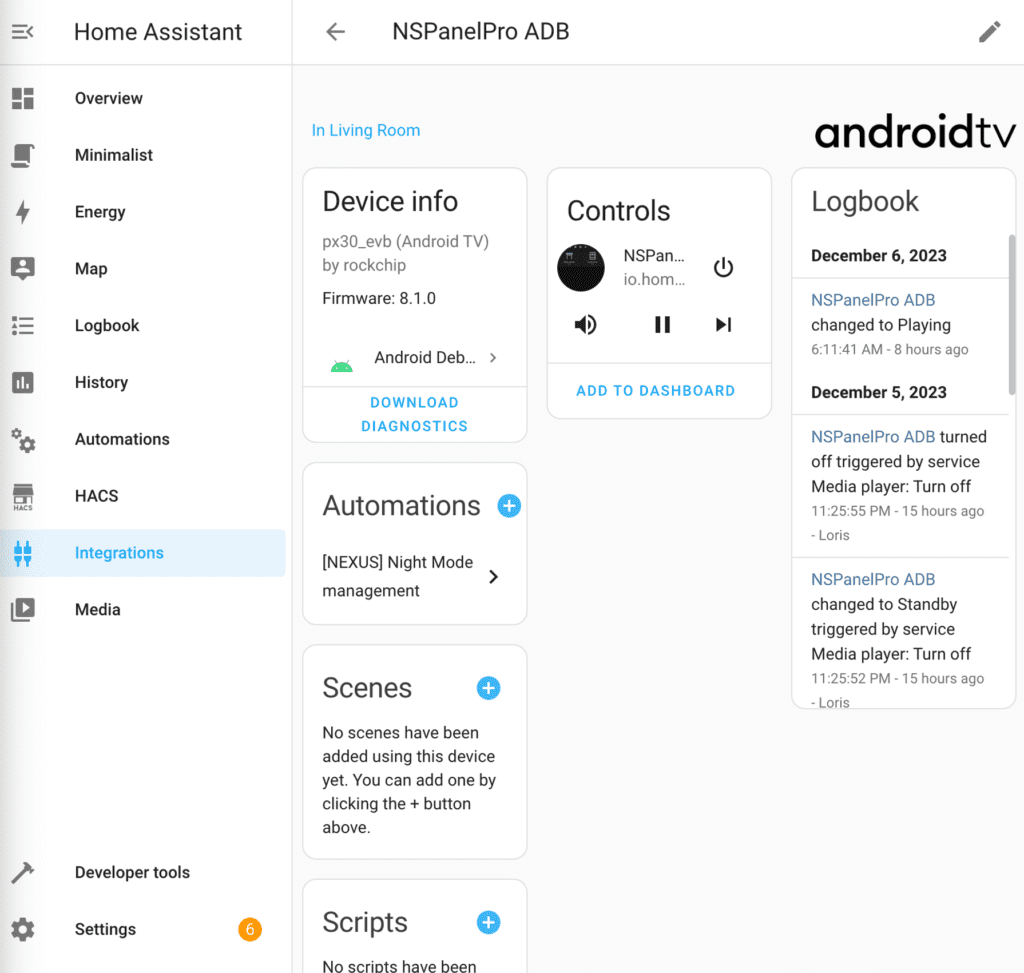
If you press on the ON/OFF button you will see that your screen turns on and off. But we won’t be using that specific media_player integration as it is imprecise.
In fact, that ON/OFF button is both ON and OFF command regardless of the current state, meaning that if you want to send an OFF command by mistake when the screen is already OFF, it will just turn back ON.
Instead, when you create an automation to turn it ON you can use this service call:
service: androidtv.adb_command
data:
  command: input keyevent 224
target:
  device_id: 0fe01497dc1be2cb50dfc933c27f94b1
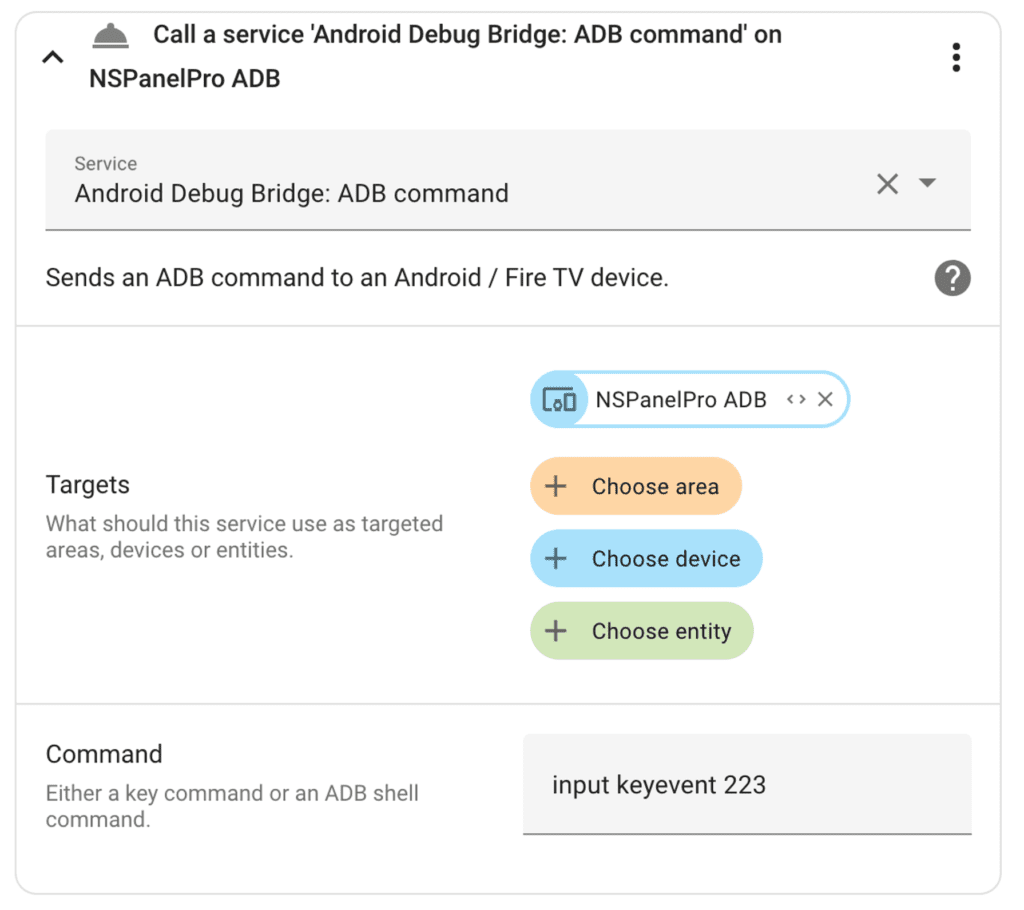
To turn it off, use this instead:
service: androidtv.adb_command
data:
  command: input keyevent 223
target:
  device_id: 0fe01497dc1be2cb50dfc933c27f94b1
Graphically, it looks like that:
The usage of those commands in automations is up to your creativity and hardware available.
On my side, I’m sending ON and OFF commands based on the presence status in the room the panel is installed.
And that’s all! Please feel free to share your setups and UIs on the Discord! I’ll see you there.